|
I am honored to be guest posting today. I love Lindsey and her blog (in that order)! She and I have known each other for years now and trade ideas often! (Us moms have to look out for one another!) . Do you have a love/hate relationship with Pinterest? I know I do! I see so many awesome ideas and I want to try them all...only to find out that my pocket book won't allow it or I just really don't end up liking someone else's style as my own. Which leads me to today's topic: . Personalize Pinterest Possibilities for Pennies! (try saying that 5 times fast...). I use the following when creating something for my own home: 1. Use materials you have easy access to, you are comfortable working with, cheap to purchase or better yet...FREE! 2. A DIY project should not involve purchasing costly tools UNLESS you plan on using those tools OVER and OVER till death do you part! 3. Find something you like the look of and picture it in your own home (this helps me weed out the things that I find are nice to look at vs. things that will actually look good with my current stuff 4. Don't follow someone's idea exactly, or you will never ever be satisfied-find your own spin and create something BASED on what you see, not IDENTICAL to it 5. When reading a tutorial, remember that one person's way of doing things isn't always the best (for you!). I really hate following directions. Just ask my husband...I look at something and try to figure it out based on looking at it...I don't want to read about it first. It drives him nuts. :) 6. All about those pennies! In many cases, making it yourself can be cheaper and more rewarding...BUT (dare I say it...) are you making a "DIY" holiday sign that costs you $20 in materials when you can hit up the Target Dollar Spot for one already made for $3? Decide what is worth DIY-ing before you start buying..
Just for fun, here are some examples of things I have DIYed, LOOSELY based on things I have seen on Pinterest (illustrating my 6 guidelines and giving YOU some ideas for your home). Faux Valentine Chocolate Décor This idea really came from my head after being introduced to Model Magic Clay around Christmas-time. I hopped on Pinterest and found felt and crocheted chocolates (both of which were cute but not my style) so I just went with the image in my head and waltzed into Michaels and purchased brown, pink and white bags of Model Magic for 50% off. Making each bag $2.50. (I had some green leftover from ornaments I made-don't judge). When all was said and done, I spent less than 2 hours of my time and made 32 chocolates (coming in at .23 cents per chocolate). I gave some to my mother and am

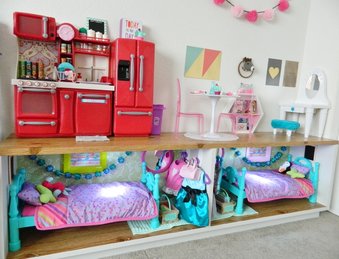
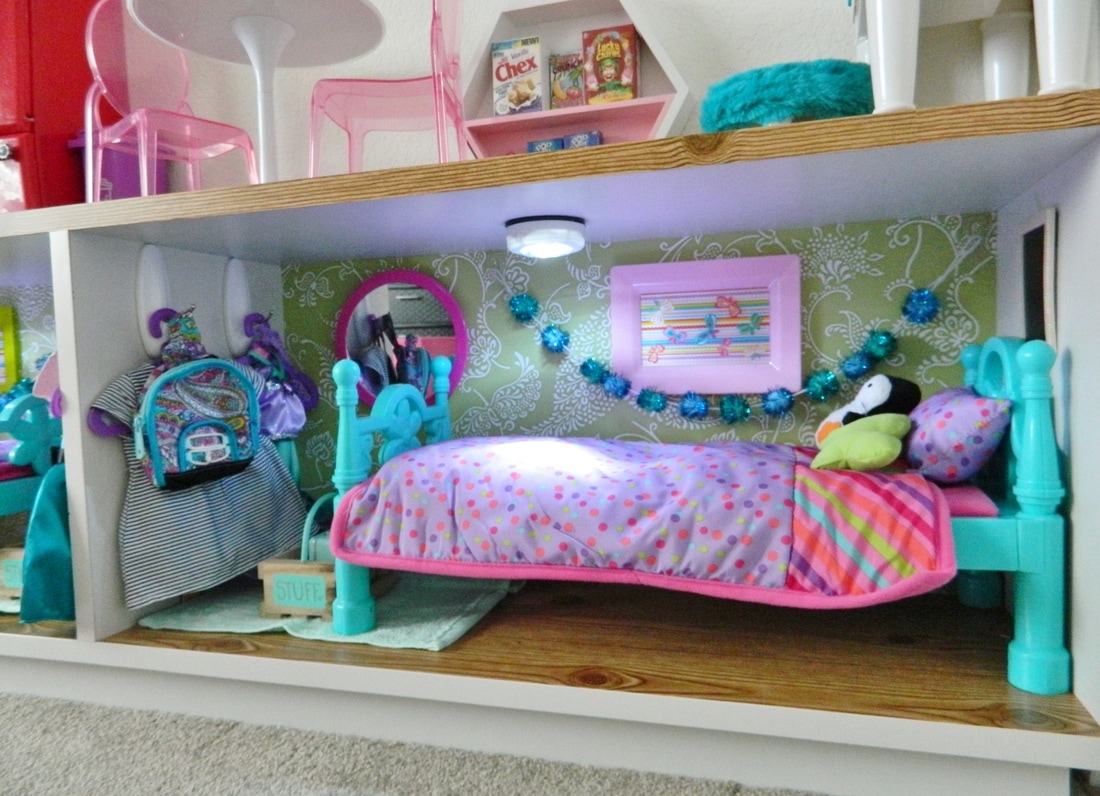
I have two daughters. Both received a lower-end version of an American Doll for Christmas. Between grandmas and good ol' mom and dad, they were outfitted with better furniture and accessories than we have for ourselves. (In true frugal fashion, it was all on sale thankyouverymuch). I am really tight with Santa-so since I knew he was bringing this, I had to prepare to store these LARGE toys in a way that wouldn't look junky and was still accessible to play without moving everything in their room to get to it. On Pinterest, the ideas for 18" Doll homes are overwhelming and completely out of my price range or possibility range. I looked at what I had and realized that I could do whatever I wanted. There are NO RULES. Remember? We have a great thrift store find from years ago-a beat up old white bench. I have considered donating it back several times but it always ends up being something new. It suddenly became a perfect apartment space for two dolls. The Dollar Tree had wood looking contact paper and wallpaper looking contact paper, adhesive push lights, and mini artwork. Within a couple of hours (a under $10), I was a landlord to two very lucky 18" dolls. It serves as storage, play area and looks cute in my girls shared bedroom.
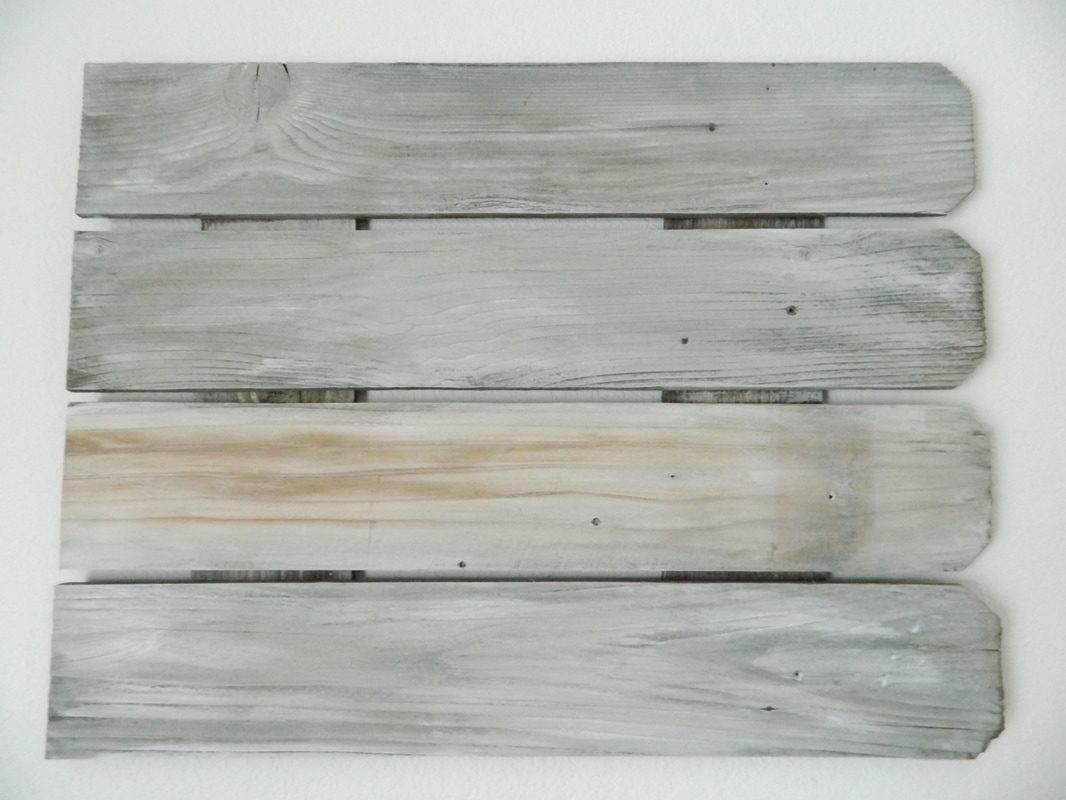
DIY Wood Wall Art
Wood is all the rage. At least in my heart, it is. I see these giant slabs of beaten up wood hanging on the walls of Pinterest moms all over the internet. I knew I could make these myself and to my liking, but when I looked at instructions (I know...I told you it was a bad idea), I was SUPER discouraged to even try. With a list of 20 different primers and strippers just to get a white washed look, I was out! So I decided that I would use what I had. Free old, beaten up barn wood, some leftover white paint and water. I have access to a saw, a hammer and a husband-so I was set! We cut the wood, nailed it together (via wood pieces on the back) and I washed the wood with vinegar and soapy water, then I watered down white paint and wiped it away until I got my desired look. No crazy expensive paint primers and no nutty 7-hour instructions. Annnndddd...FREE. The point is-if you see something in your head and you want it to come to life--you can do it! Even on a tight budget! Creativity, desire and willingness to try is all you need to get started. Be inspired (not bound) by things you see-make them your own!
4 Comments
|

Hello, I'm LindseyA wife to hubby pursing higher education, a mother to three energetic kids, obsessed with all things farmhouse vintage and believer that food always taste better when it is shared. Categories
All
|


 RSS Feed
